Blog
- Details
- Written by R. Elizondo
- Category: Databases
MySql Workbench is a great tool not only for managing a Database but for Modeling Schemas. With the modeler you can very easily generate all the code required for creating Tables, Indexes and Table Associations.
A Schema is basically a collection of Tables, Views, Indexes, Users allowed to access, Triggers, Stored Procedures, etc. It is common to confuse a Database with a Schema and more when you only have one schema in your Database.
Prerequisites:
- Have downloaded and installed MySql workbench
- Have a MySql / MariaDB server installed and running.For local development you may refer to: Configure MariaDB in a Vagrant Virtual Machine
- Have a connection available in Workbech to the Db Server running. For local development you may refer to: Connect MySql Workbench to a running instance in a Vagrant Machine
Step 1. Create a new Schema model.
Click on the model tab then the plus sign:

And a new schema page is opened:

Step 2. Right click on mydb tab and select edit.
Change the name of the schema and also choose character set. Recommended is utf8mb4 and general_ci for collation:

Step 3. Double click on the Add Diagram icon at the top.
A new model diagram page is opened:
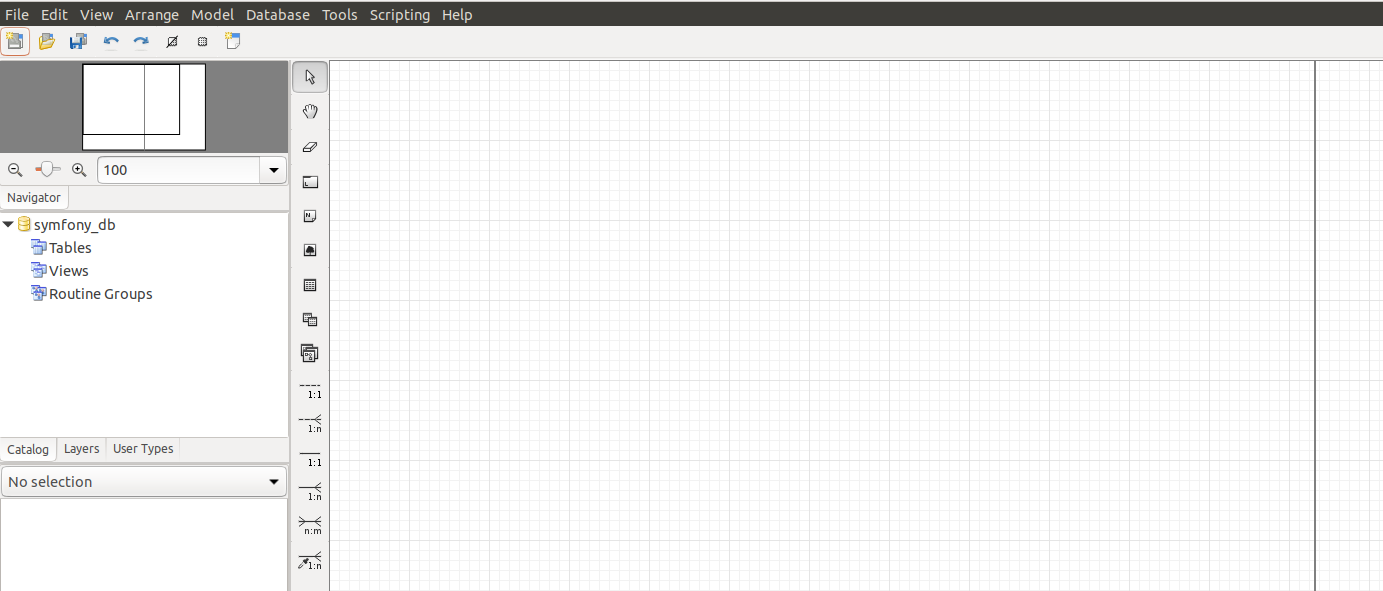
Step 4. Click on the table icon then click on the page.
Once the new table is placed, double click on it to edit its properties:

Give a name to this new table and then click on the Columns Tab. Then start adding all the columns you need. For each column you may want to choose data type, if nullable, etc.
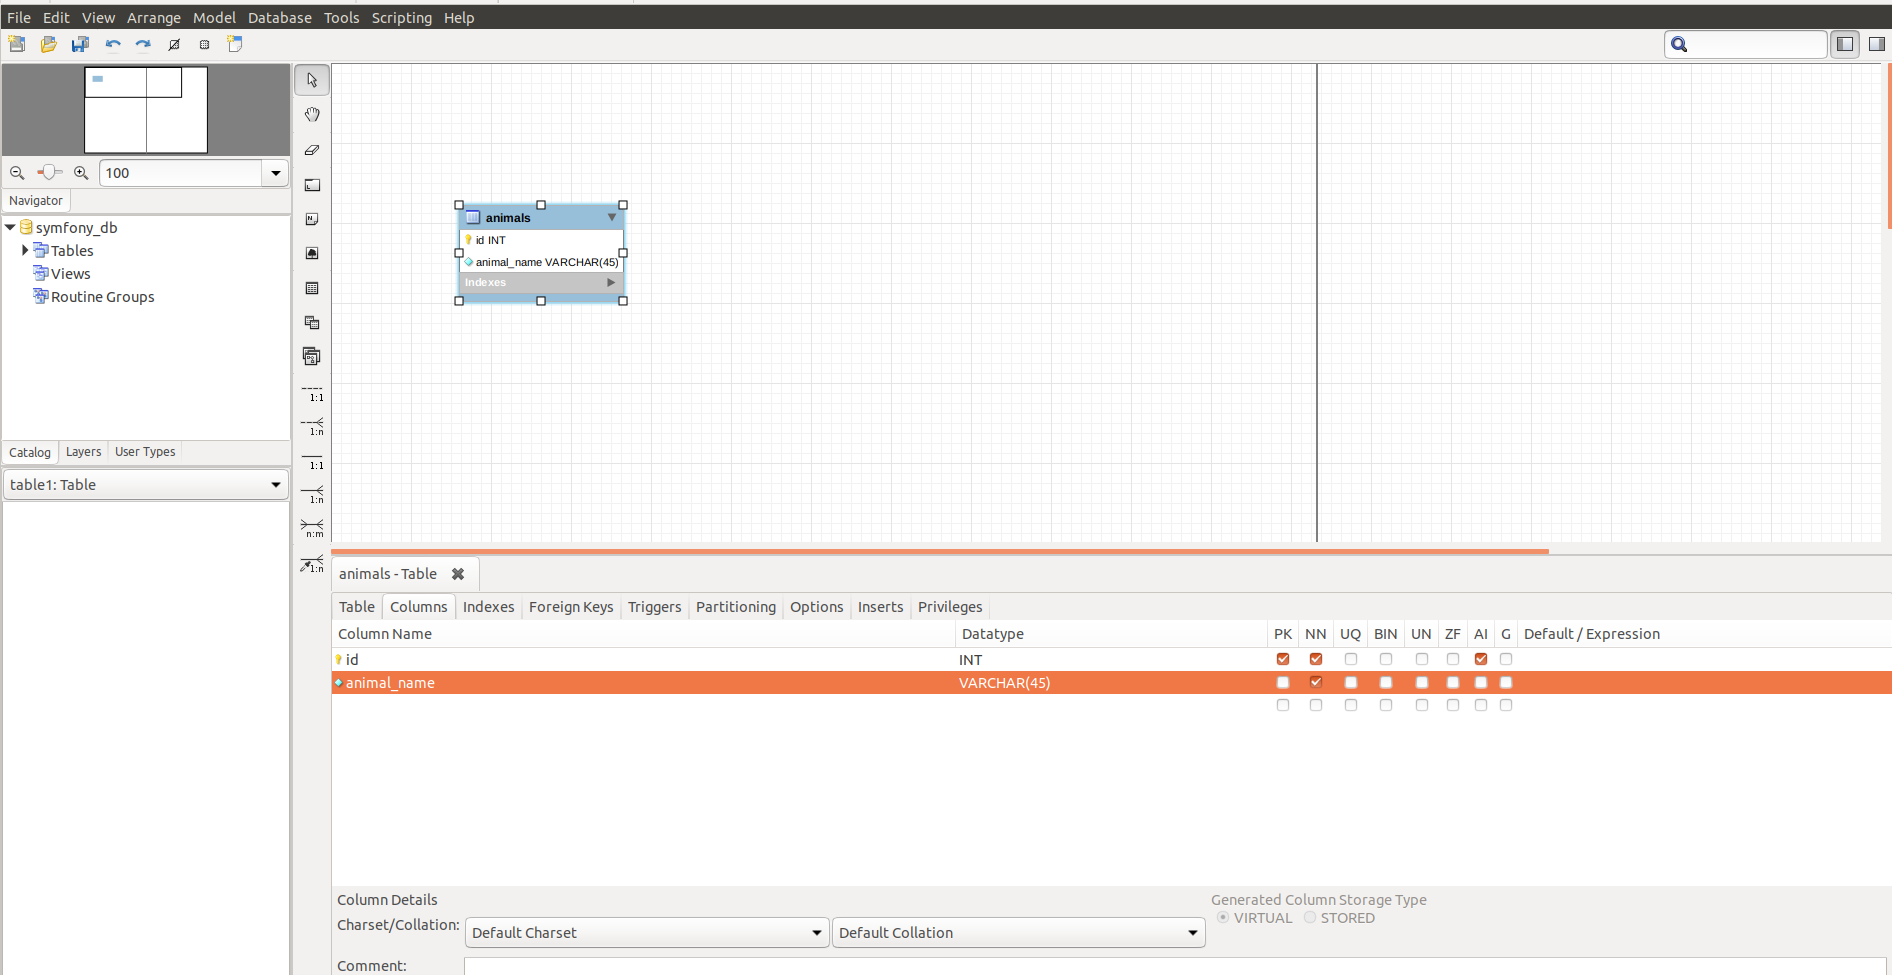
Important: don't forget to save your model. just Click on File > Save Model as...
Step 5. If the next table is similar to the first one.. just copy - paste it to duplicate it. Then double click on it and change the name and update columns.

If you need to define table associations, just click on the type you want and then click on one table and then on the other:

Step 6. Once you have placed all Tables, Indexes, Associations, etc. then click on the Database menu option and select Forward Engineer.
A dialog opens up showing the details of the connection:
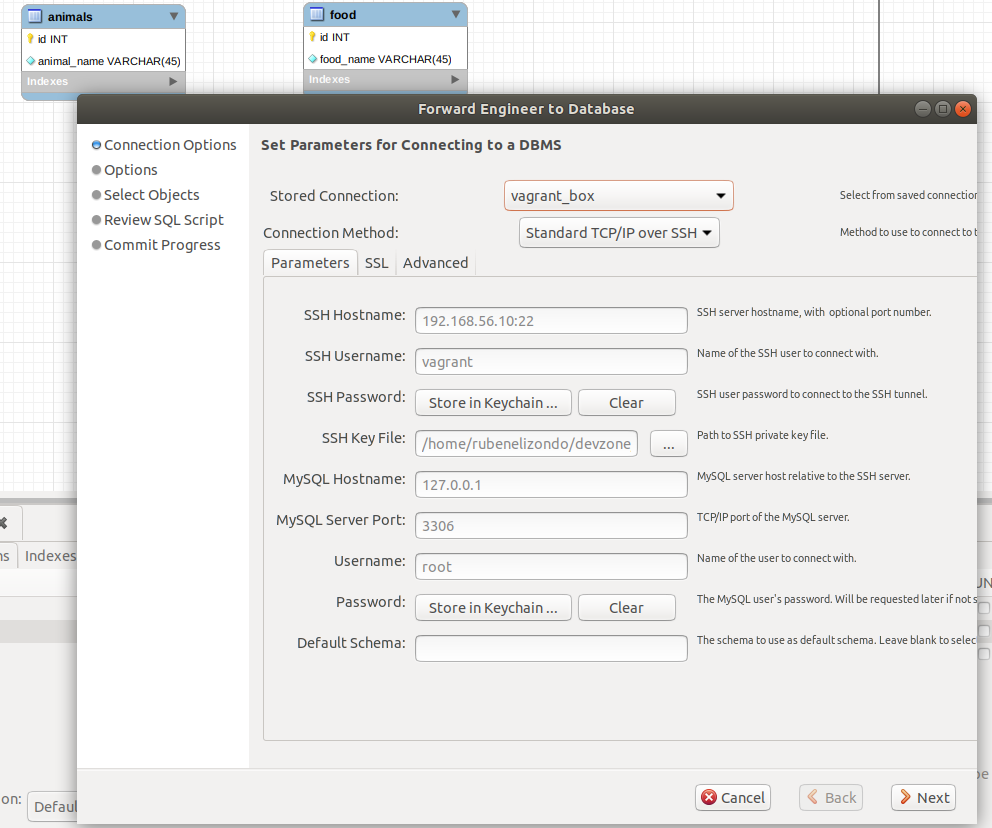
click on Next choosing the required options for each step. most of the time accept the defaults. once you reach the review Sql Script, you may want to save it for sharing or later use:
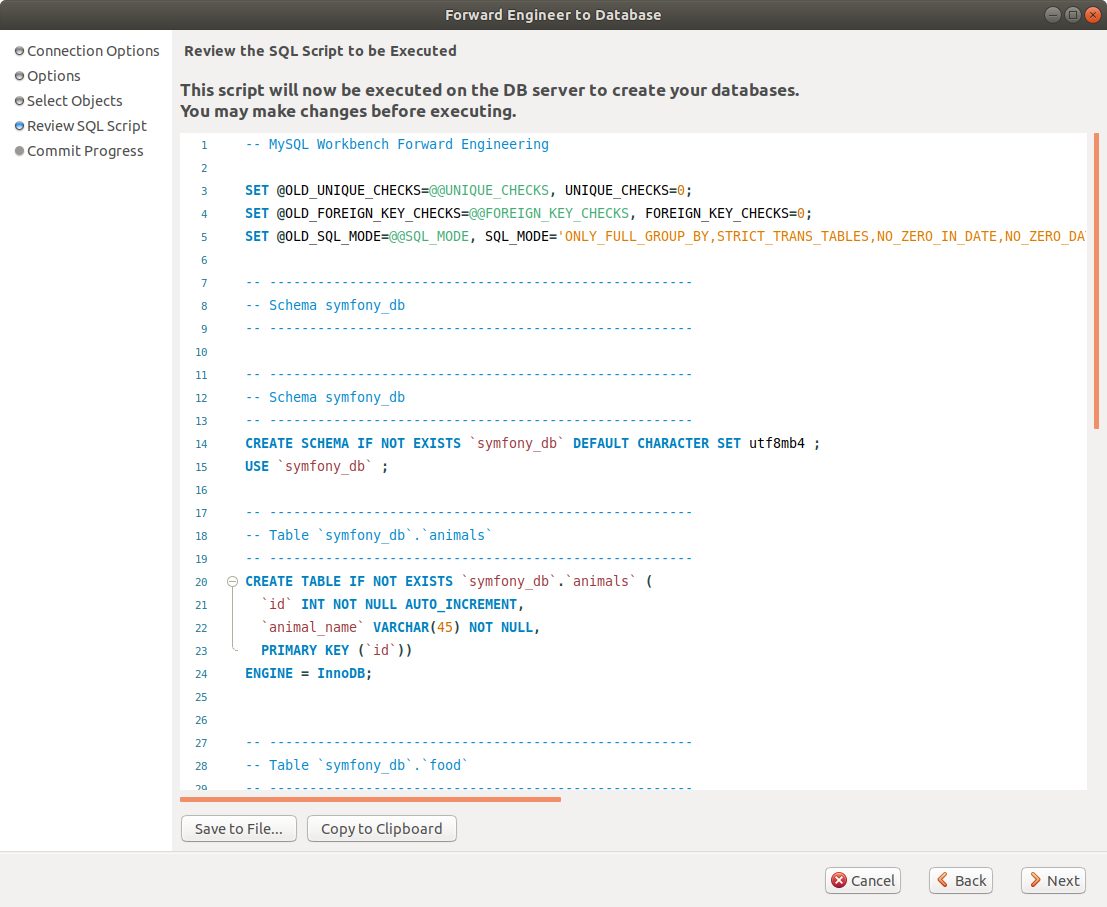
Click on next and Workbench will take care of applying this sql script to the new created schema. Close the dialog window and close the diagram tab. You will see that the tables are already in your schema:

The visual modeler is a great tool and it allows you to get a better picture of how the data is persisted.
- Details
- Written by R. Elizondo
- Category: Databases
MySql Workbench is a great tool for Database Administration and visualization. You can easily view all the Tables, Views, Stored Procedures, etc. available in a Schema and also, view the Data each table is handling and run queries. Workbench can be connected to any DB Server creating a SSH Tunnel. For local development this are the steps to follow if you are using a Vagrant Virtual Machine.
Prerequisites:
- Have downloaded and installed MySql workbench
- Have a MySql / MariaDB server installed and running.For local development you may refer to: Configure MariaDB in a Vagrant Virtual Machine
Step 1. Turn on your vagrant virtual machine:
~/devzone/cool_vagrant_project$ vagrant upStep 2. Get from the Vagrantfile the ip you set for private network:
  # Use private network
  config.vm.network "private_network", ip: "192.168.56.10"
Step 3. Open MySql Workbench and create new Connection.
- Enter that ip in the SSH Hostname followed by the :22 port
- Use vagrant as SSH Username
- Leave SSH Password
- Provide the absolute path to:
/home/.../.../cool_vagrant_project/.vagrant/machines/default/virtualbox/private_key- For the MySQL Host enter 127.0.0.1
- Port 3306
- Enter Username and Password of the user (Refer to Vagrant Virtual Machine with CentOS 7, Nginx, MariaDb, NodeJs and PHP 8 and Configure MariaDB in a Vagrant Virtual Machine )
- You may leave the default schema empty.
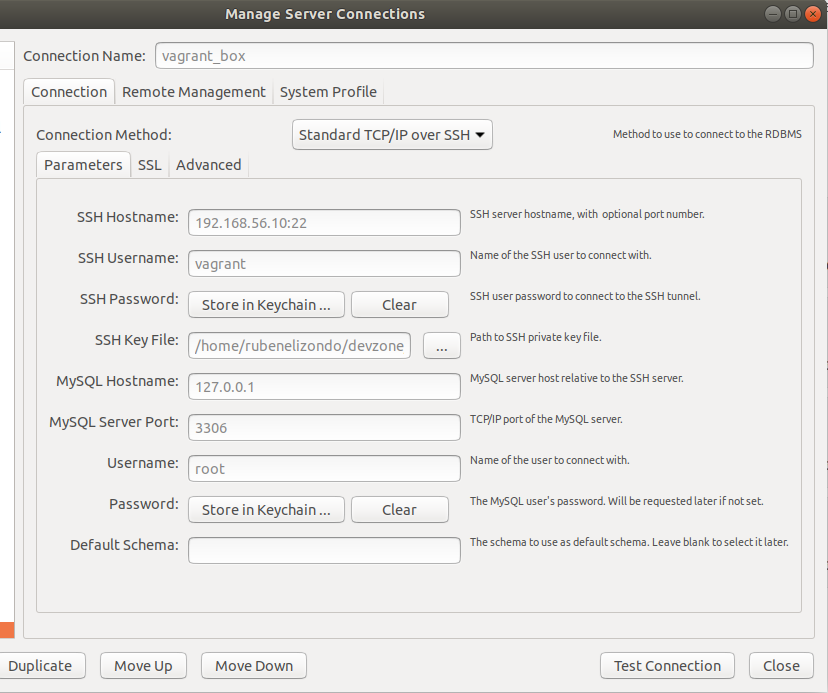
Step 4. Click on Test Connection Button. If ok, then close the dialog and your new connection is ready to be used
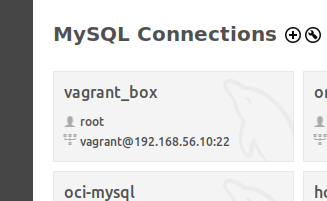
From now on, you just need to click on that connection button to open a query editor:
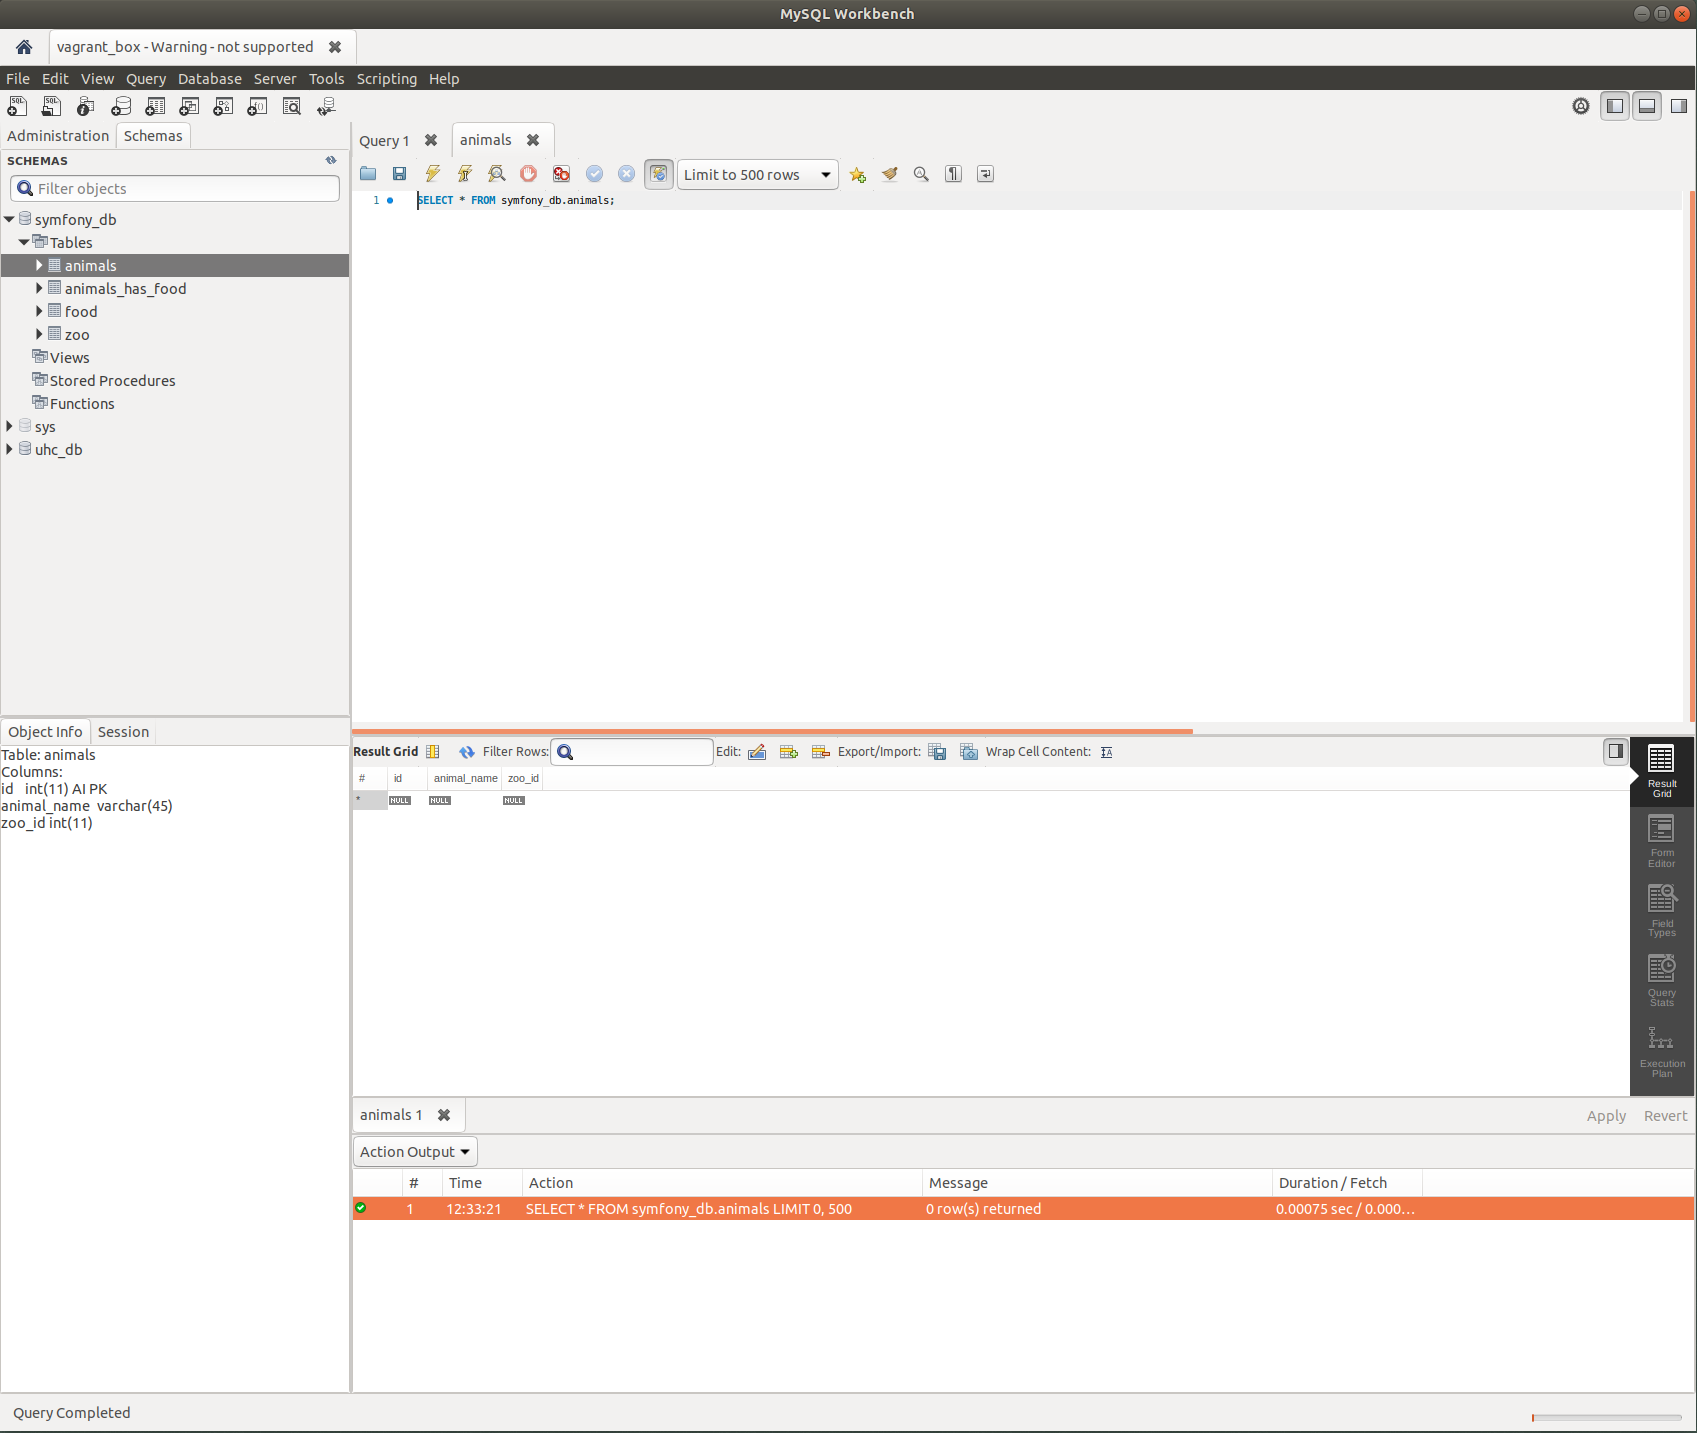
Close the session closing the tab.
- Details
- Written by R. Elizondo
- Category: Symfony Framework
JWT or Json Web Tokens are becoming the standard for Authentication in Http REST Api calls. In Symfony we have the lexik/jwt-authentication-bundle available as a package that allow us to manage jwt in a very easy way.
Step 1. Install the library using Composer:
composer require lexik/jwt-authentication-bundle
Step 2. Configure the bundle in your Symfony application by adding the following lines to your config/bundles.php file:
return [
    // ...
    Lexik\Bundle\JWTAuthenticationBundle\LexikJWTAuthenticationBundle::class => ['all' => true],
];
Step 3. Configure the JWT authentication in your config/packages/lexik_jwt_authentication.yaml file. Here's an example configuration:
lexik_jwt_authentication:
    secret_key: '%env(APP_SECRET)%'
    public_key: '%env(JWT_PUBLIC_KEY_PATH)%'
    pass_phrase: '%env(JWT_PASSPHRASE)%'
    token_ttl: 3600
This configuration defines the secret and public keys for JWT encryption, the passphrase for the private key (if using RSA), and the time-to-live (TTL) for the token.
Step 4. Generate the JWT token in your code:
use Lexik\Bundle\JWTAuthenticationBundle\Services\JWTTokenManagerInterface;

// Inject the JWT token manager service into your controller or service
public function myAction(JWTTokenManagerInterface $jwtManager)
{
    // Generate the token for the user
    $user = $this->getUser(); // get the user object from your authentication system
    $token = $jwtManager->create($user);

    // Return the token as a JSON response
    return $this->json(['token' => $token]);
}
Read more about this lexik bundle.
- Details
- Written by R. Elizondo
- Category: Symfony Framework
Modern Enterprise Software Applications are implemented with a backend following the Http Rest Api pattern. Each request must include an "Authorization" header with a Bearer Token as value. JWT tokens are becoming the more secure way to authenticate requests. The most common way to get a JWT from the Backend Application is implementing an "authenticate" endpoint that receives the User's username and password. You can use the endpoint provided by the lexik/jwt-authentication-bundle or you can implement your own. Follow these steps to do this:
Prerequisites: How to generate a JWT json web token in symfony framework.
Step 1. Install the necessary packages:
composer require lexik/jwt-authentication-bundle
composer require symfony/security-bundle
Step 2. Configure your security.yaml file by adding the following lines:
security:
    encoders:
        App\Entity\User:
            ### lib-sodium available in your machine
            ### If not use bcrypt
            algorithm: sodium

    providers:
        app_user_provider:
            entity:
                class: App\Entity\User
                ###This is the username
                property: email

    firewalls:
        login:
            pattern: ^/api/login
            stateless: true
            anonymous: true
            json_login:
                check_path: /api/login
                success_handler: lexik_jwt_authentication.handler.authentication_success
                failure_handler: lexik_jwt_authentication.handler.authentication_failure

    access_control:
        - { path: ^/api/login, roles: IS_AUTHENTICATED_ANONYMOUSLY }
        - { path: ^/api, roles: IS_AUTHENTICATED_FULLY }
Step 3. Create a route for handling the login request in your routes.yaml file or you may better use the new recommended way with Symfony Annotations as shown in Step 4.:
login:
    path: /api/login
    controller: App\Controller\AuthController::login
Step 4. Create an AuthController class and implement the login method:
<?php

namespace App\Controller;

use Symfony\Bundle\FrameworkBundle\Controller\AbstractController;
use Symfony\Component\HttpFoundation\JsonResponse;
use Symfony\Component\HttpFoundation\Request;
use Symfony\Component\Routing\Annotation\Route;
use Symfony\Component\Security\Core\Exception\BadCredentialsException;
use Symfony\Component\Security\Core\User\UserInterface;
use Lexik\Bundle\JWTAuthenticationBundle\Services\JWTTokenManagerInterface;
use Symfony\Component\Security\Core\Encoder\UserPasswordEncoderInterface;

class AuthController extends AbstractController
{
    /**
     * @Route("/api/login", methods={"POST"}, defaults={"_format": "json"})
     * @param Request $request
     * @param JWTTokenManagerInterface $jwtManager
     * @param UserPasswordEncoderInterface $passwordEncoder
     * @param EntityManagerInterface $em
     * @return JsonResponse
     */
    public function login(Request $request, JWTTokenManagerInterface $jwtManager, UserPasswordEncoderInterface $passwordEncoder, EntityManagerInterface $em)
    {
        $user = $em->getRepository(User::class)->findOneBy(['email' => $request->request->get('username')]);

        if (!$user) {
            throw new BadCredentialsException();
        }

        $isValid = $passwordEncoder->isPasswordValid($user, $request->request->get('password'));

        if (!$isValid) {
            throw new BadCredentialsException();
        }

        $token = $jwtManager->create($user);

        return new JsonResponse(['token' => $token]);
    }
}
Step 5. Test your endpoint by sending a POST request to /api/login with a JSON payload containing the username and password fields:
{
"username": "This email address is being protected from spambots. You need JavaScript enabled to view it.",
"password": "password123"
}
Important!: As best practice and to prevent security breaches, send hashed passwords with an algorithm that can be implemented in the frontend application that can be de-hashed by the backend.
Page 9 of 42

